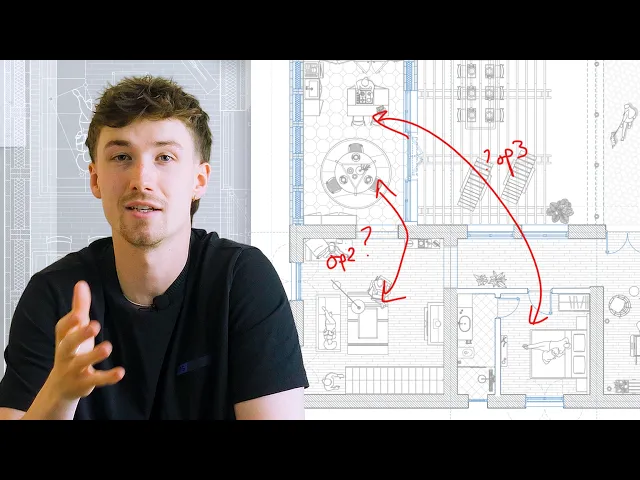
How to draw & present multiple floor plan options to a client (tutorial)
How a barn conversion on England's south-west coast evolved through several floor plan options to the final design proposal.
What you'll learn
Learn how to develop and present multiple floor plan design options for a client project in Rayon. The workflow covers duplicating plans on the canvas, arranging blocks and finishes, setting up paper canvas sheets with viewports, and exporting drawings to PDF.
Duplicate Floor Plans on the Canvas
Select and copy the base floor plan across the canvas so that multiple design options sit side by side. Stripping back the duplicate layouts allows you to easily cross-reference dimensions while testing alternative spatial arrangements. This canvas-based approach provides a clear overview without having to toggle separate layers on and off.
Insert Furniture Blocks From Block Library
Browse or search the block library on the left panel to locate required furniture, such as an L-shaped sofa or complete kitchen assemblies. Place blocks onto the plan and select top-down, front, or side view options in the right-hand panel to fit your drawing orientation. Rotate or modify individual elements within group blocks to suit the room dimensions.
Assign Room Zones and Floor Finishes
Copy existing room zones into the modified options to automatically recognize enclosed spaces. Apply desired surface materials, such as timber flooring, across the defined areas through the zone settings. Place scale figures from the library or earlier drawings into the layout to demonstrate how each space functions.
Standardize Graphic Styles Across Blocks
Select newly placed components, such as TV units or cabinetry, to inspect their applied graphic styles in the right panel. Click the four dots icon to browse styles and assign the standard furniture fill style across all elements. Aligning border and fill styling ensures the drawing appears visually consistent without overpowering the architectural lines.
Model Partitions and Trim Wall Intersections
Draw low-level partition walls to establish clear visual divides between adjacent functional zones like the kitchen and dining areas. Adjust wall layouts in tight spaces such as the bathroom, aligning geometry to accommodate wardrobes and fixtures. Type TR to trim intersecting wall edges cleanly, and match wall thickness and color to existing structural lines.
Create Sheets in the Paper Canvas
Switch from the model canvas to the paper canvas to prepare drawings for client presentation. Click the plus button to generate a new page and select an appropriate sheet format such as A2. Alternatively, copy across existing layout sheets to preserve title block layouts and drawing borders.
Add Viewports and Set Drawing Scales
Add a view onto the paper canvas to create an active viewport peering directly into the model canvas geometry. Pan inside the viewport to frame the corresponding layout option alongside its sheet border. Set the viewport scale on the right-hand properties panel, adjusting to 1:100, and crop the view boundary cleanly.
Update Title Block Properties and Revisions
Select the copied title block on each sheet and edit its properties in the right panel to update drawing numbers for each option. Click directly into the title block fields to append new revision markers and the current date. Custom or preset title blocks can also be pulled directly from the block library as needed.
Export Presentation Sheets as PDF
Open the pages panel on the left side of the screen to prepare the sheets for client delivery. Select the export option, define the page range to include specific sheets or all options, and choose the desired image quality. Download the resulting PDF file to package and distribute the visual proposals.
Interior design workflows
Architects Can Do Interior Design. Here's What It Took Me to Learn
Why Your Interior Design Project Presentation Doesn't Look Professional (and How to Fix It)
How I Built a Luxury Interior Design Project Presentation (Rayon Template)
How I Go From an Architect's Drawing to a Furnished Interior Floor Plan
Interior Design AI Rendering From Floor Plan to Visualisation in Seconds
9 Tools Every Interior Designer Needs in Your Workflow
From Client Email to Concept Mood Board: My Full Process in Rayon
AI Tools for Interior Designers: Tools That Are Actually Useful
Why Most Interior Design Mood Boards Don't Work (and How to Fix That)
How to Build a Client Ready Presentation (Step-by-step in Rayon)
Restaurant Interior Design Process: Layout, Mood Board, and Presentation in Rayon
How to Draw & Present Multiple Floor Plan Options to a Client (Tutorial)
The AI Interior Design Workflow That Changed How I Work (Rayon AI)
Demolition Drawing Tutorial: Essential Steps for Every Renovation
How to Convince Clients of Your Design Vision (Using Rayon)
How Rayon Replaced My Excel Schedule With a Live Drawing Table (FF&E)
How to Draw Atmospheric Lighting Plans for Client Coordination
How to create FF&E Schedules That Update Automatically with Your Drawings (Tutorial)
How Rayon Made Millwork Drawing 5x Easier (Step-by-Step)
AI Floor Plan Generation: Is it Actually Helpful?
A Contemporary Spin on Millwork Drawings: Client Presentation
7 Common Layout Mistakes & How to Fix Them: Architect’s Advice
How I Built a Minimal Interior Design Concept Deck (Rayon Template)
How to Turn a Site Survey Sketch into a Floor Plan with AI
Animate Your Interior Design Presentations with AI Video (Rayon AI)
How I’d Fix This Georgian Country Home Layout: Architect Reviews
Mentioned in this video
Pages