Demolition drawing tutorial: essential steps for every renovation
Modernise a 1980s apartment: demolition drawing, reconfiguring a closed layout into an open plan, and choosing colours and finishes.
What you'll learn
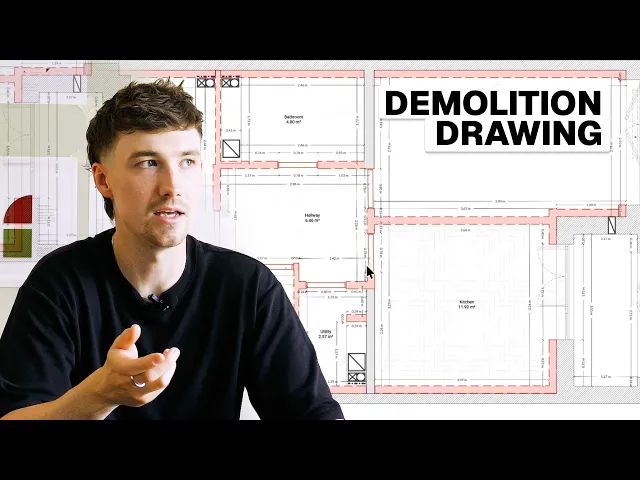
Transform an existing apartment floor plan into a clear demolition drawing by styling elements slated for removal and clarifying details with dimensions and leaders. The final drawing is composed onto a titled sheet with a dedicated legend and exported as a PDF.
Configure Demolition Wall Style
Select an existing internal wall element and open the style panel on the right side of the interface. Adjust the fill settings by testing an oblique red grid hatch, modifying its scale and intensity, and reducing the opacity if needed. Set a thicker stroke outline at 0.13 to establish a strong visual hierarchy.
Save and Apply Wall Style
Save the newly created appearance by clicking the plus icon in the style panel and naming it as a demolition wall style. Apply this style to other walls by selecting elements and using the style menu or the pick style feature. Alternatively, right-click an element to select all items sharing the same style, type, or block to batch apply the style across the plan.
Update Block Styles and Floor Finishes
Double-click into opening blocks to edit their assigned strokes and fills directly, automatically updating all matching blocks across the floor plan. Navigate to the floor finishes and select their existing hatches, such as bathroom grid tiles or wood flooring. Change the stroke color of these finish patterns to red to designate them for demolition.
Modify Style and Split Wall Elements
Update the saved demolition wall style across the drawing by switching the fill to a solid red and altering the stroke to a dashed line. Where joined wall segments fail to show a clear division between demolished and retained sections, draw a polyline to mark the split. Adjust the polyline stroke properties in the panel on the right to match the visual convention.
Add Dimensions with Dimension Tool
Select the dimension tool located within the annotation tools along the bottom bar. Click two points on the canvas to place dimensions between demolished elements, confirming distances and scale for contractors. Use the right-hand panel to customize text size, font type, stroke, end pieces, and display settings for units and precision.
Clarify Scope with Annotation Leaders
Place annotation leaders from the bottom annotation bar to clarify elements that may appear ambiguous on the plan. Add specific textual notes pointing to items such as the demolition of existing thermal lining and window sills. Adjust leader properties on the canvas, modifying their positions and angles to ensure clear legibility.
Build Demolition Drawing Legend
Copy existing styled wall elements alongside the main floor plan to serve as graphic swatches for the visual key. Place text labels next to each swatch to identify demolished walls and retained existing walls. Position these graphic elements and labels so they can be referenced separately without cluttering the primary floor plan.
Create Paper Canvas and Title Block
Switch from the model canvas to the paper canvas to set up a presentation drawing sheet. Create a new page, select the A3 format, and adjust sheet properties such as orientation and background color. Open the block library on the left side, navigate to annotations and title blocks, and drag an A3 title block directly onto the page.
Insert and Crop Model Viewport
Add a new viewport view linking back to the model canvas and set its drawing scale to 1:50. Crop the viewport by dragging its bounding edges or double-clicking inside to reposition the plan within the frame. Create a secondary view specifically targeting the legend drawn on the model canvas, then position and align it within the title block table.
Export Completed Sheet to PDF
Review the finalized drawing sheet to confirm that annotations, north arrow, scale bar, and legend are aligned properly. Open the pages panel located on the left-hand side of the workspace. Select the export option to output the complete paper canvas page as a PDF file ready for distribution to stripout contractors.
Interior design workflows
Architects Can Do Interior Design. Here's What It Took Me to Learn
Why Your Interior Design Project Presentation Doesn't Look Professional (and How to Fix It)
How I Built a Luxury Interior Design Project Presentation (Rayon Template)
How I Go From an Architect's Drawing to a Furnished Interior Floor Plan
Interior Design AI Rendering From Floor Plan to Visualisation in Seconds
9 Tools Every Interior Designer Needs in Your Workflow
From Client Email to Concept Mood Board: My Full Process in Rayon
AI Tools for Interior Designers: Tools That Are Actually Useful
Why Most Interior Design Mood Boards Don't Work (and How to Fix That)
How to Build a Client Ready Presentation (Step-by-step in Rayon)
Restaurant Interior Design Process: Layout, Mood Board, and Presentation in Rayon
How to Draw & Present Multiple Floor Plan Options to a Client (Tutorial)
The AI Interior Design Workflow That Changed How I Work (Rayon AI)
Demolition Drawing Tutorial: Essential Steps for Every Renovation
How to Convince Clients of Your Design Vision (Using Rayon)
How Rayon Replaced My Excel Schedule With a Live Drawing Table (FF&E)
How to Draw Atmospheric Lighting Plans for Client Coordination
How to create FF&E Schedules That Update Automatically with Your Drawings (Tutorial)
How Rayon Made Millwork Drawing 5x Easier (Step-by-Step)
AI Floor Plan Generation: Is it Actually Helpful?
A Contemporary Spin on Millwork Drawings: Client Presentation
7 Common Layout Mistakes & How to Fix Them: Architect’s Advice
How I Built a Minimal Interior Design Concept Deck (Rayon Template)
How to Turn a Site Survey Sketch into a Floor Plan with AI
Animate Your Interior Design Presentations with AI Video (Rayon AI)
How I’d Fix This Georgian Country Home Layout: Architect Reviews
Mentioned in this video
Styles